I was sitting on my floor last Tuesday, surrounded by a sea of particle board and confusing instruction manuals, staring at a “simple” flat-pack desk that felt more like a jigsaw puzzle from hell. It’s a common myth that you need a professional workshop or a degree in carpentry to create a beautiful workspace, but honestly, that’s just a recipe for unnecessary stress. I learned the hard way that learning how to build a desk doesn’t have to involve expensive power tools or a complete overhaul of your living room. In fact, sometimes the most soul-soothing projects come from the simplest materials and a little bit of patience.
In this guide, I’m stripping away all the technical jargon to show you a straightforward, approachable way to craft something sturdy and stylish. I’ll walk you through my favorite no-nonsense methods for selecting materials, assembling your pieces, and finishing your project so it actually supports your best self. Whether you’re a total beginner or just looking to upcycle some old wood, I promise to share the practical, step-by-step advice you need to build a workspace that brings you peace of mind.
Table of Contents
- Step-by-Step Instructions
- Simple Minimalist Desk Design Ideas for Calm Spaces
- Essential Woodworking Tools for Beginners to Start Small
- A Few Little Secrets for a Smooth Build
- Quick Reminders for Your Desk-Building Journey
- A Little Piece of Mind
- Bringing Your Vision to Life
- Frequently Asked Questions
Guide Overview
Tools & Supplies
- Power Drill and bits for driving screws
- Circular Saw or Hand Saw for cutting wood
- Sandpaper for smoothing surfaces
- Measuring Tape for accurate dimensions
- Level to ensure a flat surface
- Wood Planks (Desktop) 1 unit
- 4×4 Wood Posts (Legs) 4 units
- Wood Screws 1 box
- Wood Glue 1 bottle
- Wood Stain or Paint 1 can
Step-by-Step Instructions
- 1. First things first, let’s get our supplies together so we don’t have to keep running back to the hardware store mid-project. You’ll need a sturdy piece of wood for the desktop (I personally love a thick piece of pine or even a reclaimed butcher block if you can find one!), four legs, some heavy-duty wood screws, a drill, and a sander. Having everything laid out on your floor before you start makes the whole process feel so much more manageable.
- 2. Once you have your materials, it’s time to prep that desktop. If you’re using raw wood, you’ll want to spend some quality time with your sander. Start with a coarser grit to smooth out any bumps and work your way up to a fine grit until the surface feels silky smooth to the touch. This is the secret to a professional-looking finish that won’t snag your sleeves while you’re working.
- 3. Now, let’s figure out where those legs are going to live. Flip your desktop upside down on a soft surface—like an old blanket—to prevent any scratches. Use a measuring tape to mark exactly where each leg will sit. I usually recommend leaving about an inch or two of space from the edges to keep things looking visually balanced and to ensure the desk feels stable once it’s upright.
- 4. Before you start driving screws into your beautiful wood, I highly recommend drilling “pilot holes.” This is a tiny step that makes a huge difference because it prevents the wood from splitting when you tighten the hardware. Just use a drill bit that is slightly smaller than your screws and take your time to make sure your marks are precise.
- 5. It’s time to attach the legs! Line up your first leg with the pilot holes you just drilled, and use your drill to secure it firmly to the desktop. Repeat this for the other three legs, making sure they are all perfectly aligned so your desk doesn’t end up wobbling like a jelly mold. If you feel any resistance, double-check that your drill is at the right speed.
- 6. Now for the fun part: giving your desk its personality! You can leave the wood natural for a rustic vibe, or apply a stain or paint to match your room. If you’re like me and love a bit of an upcycled look, a light coat of wax can give it a beautiful, matte finish that feels warm and inviting. Just make sure to let it dry completely before you try to put anything on it.
- 7. Finally, flip your masterpiece over and give it a little test run. Place it in your workspace, clear off any clutter, and see how it feels. If it feels a little unsteady, you can always add some felt pads to the bottom of the legs to level things out. Now, grab a cup of coffee, sit down, and enjoy the incredible feeling of working at something you built with your own two hands!
Simple Minimalist Desk Design Ideas for Calm Spaces
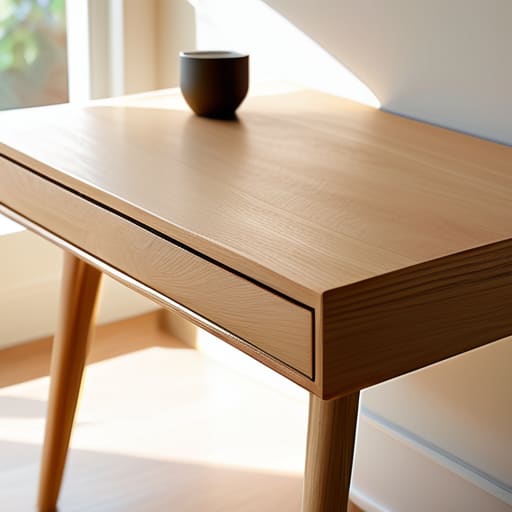
When you’re stepping into the world of DIY, it’s easy to get caught up in wanting a massive, ornate piece of furniture. But honestly? I’ve found that less is almost always more when it comes to your mental clarity. If you’re looking for minimalist desk design ideas, I always suggest sticking to clean lines and a neutral color palette. Think of a simple thick slab of oak or pine resting on slim, tapered legs. This approach doesn’t just look chic in a modern apartment; it actually helps reduce visual clutter, which is a total game-changer for staying focused during a long workday.
If you’re feeling a little nervous about the technical side, don’t sweat it! You don’t need a workshop full of heavy machinery to get professional results. There are so many easy woodworking desk projects designed specifically for those of us who are just starting out. I love focusing on a “floating” aesthetic or using simple trestle legs to keep the design airy. By prioritizing a few high-quality materials rather than a dozen complex features, you create a sanctuary that feels intentional, calm, and—most importantly—completely yours.
Essential Woodworking Tools for Beginners to Start Small
Now, I know what you’re thinking: “Emma, do I need a professional workshop and a mountain of expensive machinery to pull this off?” Honestly, the answer is a resounding no! When you’re first diving into woodworking tools for beginners, the secret is to focus on quality over quantity. You don’t need every gadget under the sun; you just need a few reliable essentials that will help you execute your vision without the stress. I always recommend starting with a solid cordless drill, a measuring tape that you actually trust, and a good orbital sander. These are the real workhorses that turn a pile of lumber into something beautiful.
While it’s tempting to run out and buy every tool on the shelf, I’ve learned that keeping it simple actually makes the process much more enjoyable. If you’re looking into easy woodworking desk projects, your goal should be precision and safety rather than complexity. Before you head to the hardware store, take a moment to jot down a quick desk assembly materials list so you aren’t making five different trips. Trust me, having your basics ready to go makes the entire experience feel less like a chore and more like the creative escape it’s meant to be.
A Few Little Secrets for a Smooth Build
- Measure twice, cut once—seriously! It sounds like a cliché, but I’ve definitely learned the hard way that a tiny mistake in your measurements can turn a beautiful piece of wood into a very expensive lesson in frustration.
- Don’t skip the sanding phase. I know it’s tempting to jump straight to the fun part, but taking the time to sand through the grits makes all the difference in how your desk feels when you’re resting your arms on it during a long workday.
- Think about your ergonomics before you drive that first screw. Make sure the height feels natural for your body so you aren’t hunching over your new creation; your back will definitely thank you later!
- Invest in a decent wood finish. Whether you go with a warm oil or a sleek matte lacquer, a good finish doesn’t just make the desk look professional, it also protects it from those inevitable coffee spills.
- Embrace the imperfections. If a knot in the wood or a tiny wobble pops up, don’t sweat it! Part of the joy of DIY is that your desk has character and a story, making it uniquely yours in a way a store-bought one never could.
Quick Reminders for Your Desk-Building Journey
Don’t feel like you need a professional workshop to start; focusing on a few essential tools and a simple design is much more rewarding than getting overwhelmed by complexity.
Remember that your workspace is an extension of your mental space, so choose a design that promotes calm and keeps your focus where it belongs.
View this project as a way to invest in yourself and your productivity, rather than just another chore on your to-do list.
A Little Piece of Mind
“Building your own desk isn’t just about putting wood and screws together; it’s about crafting a dedicated corner of the world where you can finally breathe, focus, and feel truly at home in your own productivity.”
Emma Thompson
Bringing Your Vision to Life
Building your own desk is about so much more than just assembling pieces of wood; it’s about intentionally creating a space that serves your unique needs. From selecting the right beginner-friendly tools to embracing a minimalist design that keeps your mind clear, every decision you made during this process helps shape a more productive and peaceful environment. Remember, whether you went with a sleek, modern look or a more rustic, upcycled vibe, the most important part is that you built it with your own two hands. By focusing on the basics and not letting the complexity of woodworking overwhelm you, you’ve successfully turned a simple concept into a tangible reality that will support your daily work for years to come.
As you take a moment to step back and admire your finished creation, I hope you feel that same sense of quiet pride that I feel every time I finish a new project in my own home. There is something incredibly grounding about knowing exactly how your furniture was made and how it fits perfectly into your life. Don’t be afraid to make it your own—maybe add a small plant or a lamp that makes the corner feel extra cozy. Life can get so chaotic, but having a dedicated, handmade sanctuary can make all the difference in finding your balance. You’ve got this, and I can’t wait to see how your new workspace helps you thrive every single day.
Frequently Asked Questions
I'm a bit worried about stability—how can I make sure my desk doesn't wobble when I'm typing or working?
Oh, I totally hear you! There is nothing more distracting than a desk that wobbles every time you type a frantic email. To keep things steady, I always recommend focusing on the joints. Using wood glue alongside your screws creates a much more solid bond. Also, if you’re using legs, make sure they are braced or connected by a crossbar. It adds that extra bit of structural integrity we all need for a peaceful workspace!
What kind of wood should I look for if I'm on a tight budget but still want something that looks beautiful and lasts?
If you’re watching your budget but still want that gorgeous, high-end look, I highly recommend looking into pine or birch. Pine is super affordable and easy to work with, especially if you embrace a slightly rustic, farmhouse vibe. Birch is a fantastic alternative if you want something a bit smoother and more modern-looking. Both are sturdy enough to last for years, especially if you treat them with a little love and a good sealant!
Is it possible to build a desk that fits into a really small apartment without it feeling too bulky or overwhelming?
Oh, I hear you! Living in a smaller space can definitely feel a bit claustrophobic if your furniture is too “loud.” The short answer is: absolutely! I actually love the challenge of small-space DIY. My secret is focusing on “visual lightness”—think slim legs, floating shelves, or even a wall-mounted fold-down desk. By keeping the footprint minimal and choosing lighter wood tones, you can create a functional workspace that feels like a breeze rather than a burden.
