There I was, sitting on my bathroom floor at 11:00 PM, staring at a puddle of water and wondering why I hadn’t just called a plumber. That rhythmic drip… drip… drip… was doing more than just wasting water; it was slowly chipping away at my sanity and my sleep. I used to think that learning how to fix a leaky faucet required a garage full of expensive industrial tools and a degree in engineering, but I quickly realized that most of the intimidation factor is just noise. You don’t need to be a master handyman to reclaim your quiet evenings; you just need a little patience and the right approach.
In this guide, I’m stripping away the confusing jargon and the high-stress DIY myths to give you a straightforward, no-nonsense roadmap. I’ll walk you through the exact steps I used to tackle my own plumbing mishap, focusing on the simple tools you likely already have in your junk drawer. My goal is to help you master how to fix a leaky faucet with confidence, saving you both money and a massive headache in the process. Let’s get those hands dirty and get that drip stopped for good!
Table of Contents
Guide Overview
Tools & Supplies
- Adjustable wrench for loosening nuts
- Screwdriver (Phillips or flathead) to remove handles
- Allen wrench to remove set screws
- Replacement washers or O-rings (set matching faucet model)
- Plumber's grease (small tube) for lubricating seals
Step-by-Step Instructions
- 1. First things first, we need to shut off the water so we aren’t dealing with an unexpected indoor shower. Look under your sink for the shut-off valves and turn them clockwise until they stop. Once you’ve done that, turn the faucet on to drain any remaining water in the pipes. Trust me, you’ll thank yourself later when you aren’t working in a puddle.
- 2. Next, we need to get into the guts of the faucet. Grab a screwdriver and remove the decorative cap on the handle—you know, the little one that says “H” or “C.” Once that’s off, unscrew the handle and lift it away. If it feels stuck, don’t force it; a little wiggle usually does the trick to avoid damaging the finish.
- 3. Now, you’ll see the cartridge or the stem. Use an adjustable wrench to loosen the packing nut. This is the part that holds everything together, so be sure to hold the wrench steady to prevent any slipping. Once the nut is loose, you can pull the cartridge straight up and out.
- 4. This is where the real detective work happens! Take that old cartridge or stem over to your local hardware store. Even if you think you know what it is, having the actual part in hand is the only way to ensure you get an exact match. It’s much better than driving back a second time because you bought the wrong size!
- 5. While you’re at the store, grab some plumber’s grease and a new set of O-rings just in case. Once you have your new parts, slide the new cartridge into place, making sure it aligns perfectly with the notches in the faucet body. It should feel snug but not forced.
- 6. Now, we just put everything back together in the reverse order. Screw the packing nut back on, replace the handle, and pop that decorative cap back into place. Before you celebrate, slowly turn your water valves back on to check for leaks. If everything stays dry, you’ve officially mastered a basic home repair!
Understanding Common Causes of Leaking Taps
Before we dive into the actual repairs, it’s super helpful to understand why your sink is acting up in the first place. Most of the time, it isn’t some massive, expensive disaster; it’s usually just a tiny component that has reached the end of its lifespan. When we look at the common causes of leaking taps, the culprit is often a worn-out washer or a degraded O-ring. Over time, the constant friction of turning the handle on and off simply wears these little rubber bits down until they can no longer create a watertight seal.
Depending on what kind of hardware you have in your kitchen or bathroom, the fix might look a little different. If you have a traditional compression faucet, you’ll likely just need to replace faucet washer components to get things back to normal. However, if you’re dealing with a more modern style, you might find yourself looking into cartridge faucet replacement steps instead. Understanding whether you’re dealing with a simple seal issue or a more complex valve problem makes the whole process feel much less intimidating. Once you identify the cause, you’ll feel way more confident jumping into the fix!
Essential Plumbing Tools for Faucet Repair
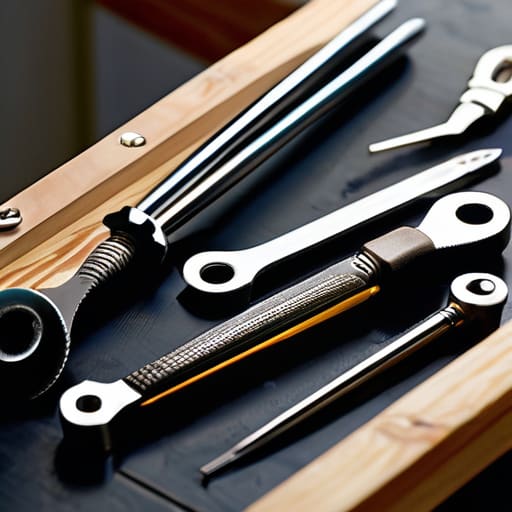
Before you dive into the actual repair, let’s talk about setting yourself up for success. There is nothing more frustrating than being halfway through a project only to realize you’re missing that one specific wrench! To tackle this, you’ll want to gather a few basic plumbing tools for faucet repair before you get your hands wet. An adjustable wrench is your best friend here, along with a set of screwdrivers (both Phillips and flathead) and perhaps a pair of needle-nose pliers for those tiny, stubborn parts. If you’re dealing with a more modern setup, you might also need a specific hex key or Allen wrench.
I always like to keep a small towel or a rag handy, too. Not only does it help you get a better grip on slippery handles, but it also protects your beautiful fixtures from getting scratched by the metal tools. If your specific model requires a cartridge faucet replacement, having a small container to organize the tiny O-rings and screws is a total lifesaver. Trust me, seeing all those little pieces neatly laid out will save you so much stress when it’s time to put everything back together!
Pro-Tips to Keep the Drips at Bay
- Don’t skip the “shut-off” step! Before you even touch a wrench, make sure you’ve turned off the water supply under the sink. There is nothing quite as stressful as a DIY project turning into an accidental indoor swimming pool.
- Take a “before” photo of every single part you remove. When you’re deep into the repair and looking at a pile of tiny washers and screws, a quick photo on your phone will be a total lifesaver when it’s time to put everything back together.
- Invest in a decent quality washer kit. Instead of running to the hardware store every time you find a new tiny part that’s broken, grab a multi-sized assortment pack. It’ll save you so much time and a few extra trips in your car.
- Be gentle with your fixtures. It’s tempting to crank that wrench as hard as you can, but being too aggressive can actually strip the threads or crack the housing. A firm, steady hand is much more effective than brute force.
- Give it a little “wellness check” afterward. Once you’ve finished the repair and turned the water back on, don’t just walk away. Leave it alone for a few minutes and keep a close eye on it to make sure everything is truly sealed and you can finally get back to your relaxing evening.
Quick Wins for a Leak-Free Home
Don’t let a small drip turn into a big headache; identifying the cause early—whether it’s a worn-out washer or a faulty cartridge—is half the battle.
You don’t need a professional plumber’s toolkit to get the job done, just a few basic tools and a little bit of patience to tackle the repair yourself.
Taking a few minutes to fix that faucet now isn’t just about saving water; it’s about reclaiming your peace of mind and keeping your home running smoothly.
Finding Calm in the Small Fixes
“Sometimes, the biggest way to reclaim your peace of mind isn’t through a massive life overhaul, but by simply rolling up your sleeves and fixing that one small, nagging drip that’s been draining your energy—and your wallet.”
Emma Thompson
You’ve Got This!
Taking the time to troubleshoot your plumbing might feel a little daunting at first, but look at how far you’ve come! By identifying whether it was a worn-out washer, a faulty O-ring, or a loose valve stem, you’ve already done the hardest part. Remember, having the right tools and a little bit of patience is really all it takes to stop that annoying drip and save yourself from a much larger repair bill down the road. It’s all about taking it one step at a time, ensuring everything is tightened properly, and testing the flow before you call it a day.
At the end of the day, fixing a leaky faucet is about more than just saving water or lowering your utility bill; it’s about that wonderful sense of accomplishment that comes from being self-sufficient. I know that moving from “I can’t do this” to “I just fixed that!” is such a powerful feeling. Don’t let these small household hiccups intimidate you. Every little win, no matter how small, is a step toward a more balanced and empowered life. So, take a deep breath, enjoy the quiet of a silent sink, and remember that you are more capable than you think!
Frequently Asked Questions
What should I do if I tighten everything but the faucet is still dripping?
Ugh, I know that feeling—you’ve tightened everything up, you’re ready to be done, and yet, drip, drip, drip. It’s so frustrating! If tightening didn’t do the trick, it usually means a part inside has actually worn out. Most likely, your washer or O-ring is cracked or flattened, or your valve seat is damaged. Don’t sweat it, though; it just means it’s time to swap out a tiny, inexpensive part rather than the whole faucet!
Is it worth trying to fix this myself, or is it time to call in a professional plumber?
Honestly, it depends on your comfort level! If it’s just a worn-out washer or a loose handle, I say go for it—it’s a great way to save some cash and feel that DIY win. But, if you notice water pooling under the sink or if you’ve tried the basics and it’s still dripping, don’t sweat it. Sometimes calling a pro is the smartest way to protect your home and your sanity.
How can I tell if I need to replace a single washer or if the entire faucet cartridge needs to go?
This is such a great question, and honestly, it’s the part that makes most people hesitate! Here’s my rule of thumb: if it’s just a tiny, consistent drip from the spout, a single washer might do the trick. But if the handle feels “mushy,” gets stuck, or if you’ve already replaced the washer and it’s still leaking, that’s a huge sign the entire cartridge is worn out. When in doubt, replacing the cartridge is usually the smoother, stress-free fix.
