I remember staring at my tiny kitchen table, trying to sand down a thrifted mid-century chair, only to realize my “workspace” was actually just a recipe for disaster. I was covered in sawdust, my coffee was spilling onto important documents, and I felt completely overwhelmed by the sheer mess of it all. It hit me then that you don’t need a massive, professional-grade workshop to get things done; you just need a dedicated spot that actually works for you. Learning how to build a workbench isn’t about mastering advanced carpentry or owning every power tool under the sun; it’s really just about creating a stable foundation for your creativity to thrive.
In this guide, I’m stripping away the intimidating jargon and the “expert-only” gatekeeping to show you how to build a sturdy, functional station that fits your specific space and budget. I’ll walk you through selecting the right materials, simple assembly steps, and a few of my favorite low-stress hacks to keep you organized. Whether you’re looking to upcycle furniture or finally start that urban garden project, we’re going to build something together that supports your craft and, more importantly, your peace of mind.
Table of Contents
- Step-by-Step Instructions
- Choosing Heavy Duty Workbench Materials for Lasting Stability
- Simple Woodworking Workbench Plans to Start Your Journey
- 5 Pro-Tips to Make Your Workbench Feel Like a Natural Extension of Your Workspace
- Quick Wins for Your New Workspace
- Finding Your Foundation
- Bringing Your Workspace to Life
- Frequently Asked Questions
Guide Overview
Tools & Supplies
- Circular saw or Miter saw for cutting lumber
- Power drill for driving screws
- Tape measure for accurate dimensions
- Speed square for ensuring 90-degree angles
- 4×4 lumber posts (for legs) 2 pieces
- 2×4 lumber boards (for frame and bracing) 8 pieces
- 3/4 inch plywood (for tabletop) 1 sheet
- 2.5 inch wood screws (for assembly) 1 box
Step-by-Step Instructions
- 1. First things first, let’s talk about the planning phase. Before you even touch a saw, grab a notebook and jot down exactly what you’ll be using this bench for. Are you planning on heavy-duty woodworking, or is this more of a dedicated space for small DIY crafts and upcycling? Knowing your intended use will help you decide on the height and the sturdiness of the materials you’ll need to buy.
- 2. Once you have a vision, it’s time to head to the hardware store for your supplies. I always recommend sticking to standard lumber sizes like 2x4s and a thick piece of plywood for the top; it keeps things much more affordable and easier to work with. Don’t forget to pick up a box of sturdy wood screws and some wood glue, because strength is everything when it comes to a workspace that won’t wobble.
- 3. Now, let’s get into the actual cutting. If you don’t own a power saw yet, don’t sweat it—most big-box hardware stores actually offer cutting services for a small fee. Measure twice, cut once (I know, it’s a cliché, but it’s so worth it), and make sure your legs and frame pieces are all exactly the same length so your bench doesn’t end up feeling lopsided.
- 4. Time to start the assembly by building your base frame. I like to start by creating two rectangular “ladders” out of your 2x4s, which will serve as the side supports. Using a drill and pilot holes is a total lifesaver here; it prevents the wood from splitting and makes the whole process way less frustrating than trying to force screws directly into the grain.
- 5. With your side frames ready, connect them using your long horizontal stretchers to create the main skeleton of the bench. As you tighten everything up, make sure you’re using your level tool to ensure the frame is perfectly flat. A sturdy, level foundation is the secret ingredient to a workspace that feels professional rather than makeshift.
- 6. Next up is the most satisfying part: attaching the tabletop. Lay your plywood sheet over the top of your frame and secure it with screws, making sure to drive them in slightly below the surface so they don’t snag your projects later. If you’re feeling extra fancy, this is a great time to sand the edges down to prevent any annoying splinters.
- 7. Finally, let’s give your new workbench a little bit of love. I love to give my DIY projects a quick once-over with some sandpaper and a clear sealant to protect the wood from spills or scratches. It’s not just about making it look pretty—it’s about making it last for all the amazing things you’re going to create on it!
Choosing Heavy Duty Workbench Materials for Lasting Stability
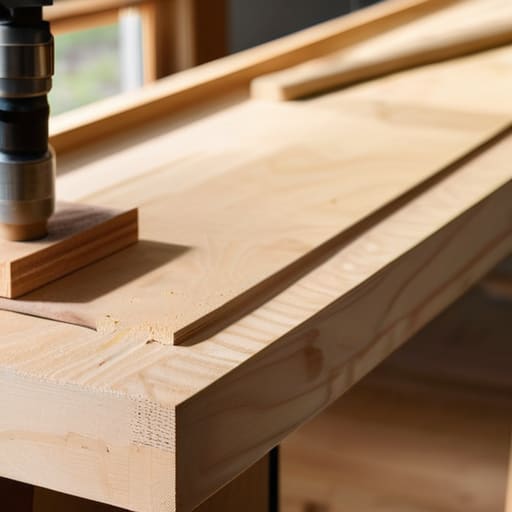
When you’re selecting your supplies, it’s tempting to just grab the cheapest lumber available at the big-box store, but I’ve learned the hard way that skimping here can lead to a wobbly mess later. If you want to succeed in building a sturdy work table, you really need to focus on density and weight. I personally love using construction-grade plywood for the top, layered with a solid hardwood like maple if your budget allows, because it provides that rock-solid surface we all crave. When looking at various heavy duty workbench materials, remember that mass is your best friend; the heavier the bench, the less it will slide around when you’re sawing or sanding.
Don’t forget that the legs are the backbone of your entire setup. I always suggest opting for thick, 4×4 posts rather than thinner 2x4s to ensure everything stays level and true over time. It’s also worth thinking ahead about how you’ll manage your gear. While you’re picking out wood, keep some workbench tool storage ideas in the back of your mind, like adding a sturdy lower shelf or even some pegboard sections. Investing in quality materials now means you won’t be rebuilding your workspace from scratch in six months!
Simple Woodworking Workbench Plans to Start Your Journey
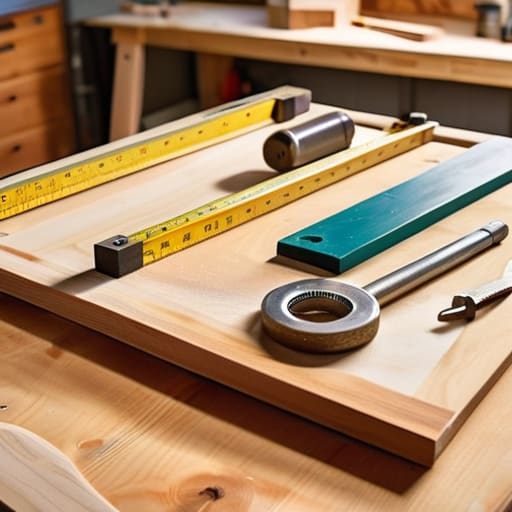
If you’re feeling a little intimidated by the idea of designing something from scratch, please know that you don’t have to reinvent the wheel! There are countless woodworking workbench plans available online, ranging from super-minimalist designs to massive, professional-grade setups. For your first go, I highly recommend looking for a “torsion box” design or a simple four-legged frame. These are much more forgiving for beginners and focus on building a sturdy work table that won’t wobble every time you hammer a nail.
As you browse through different blueprints, try to match the plan to the space you actually have. If you’re working in a small corner of the garage, a mobile workbench on casters might be your best friend. Once you’ve picked a design, start thinking ahead about your future workshop organization projects. It’s much easier to incorporate some basic workbench tool storage ideas—like a simple pegboard or a few shallow drawers—right into the initial build rather than trying to bolt them on later. Taking that extra moment to plan now will save you so much frustration down the road!
5 Pro-Tips to Make Your Workbench Feel Like a Natural Extension of Your Workspace
- Don’t forget about your height! Before you drive that first screw, grab a chair you actually use or even stand at your preferred working position to measure. There’s nothing more frustrating than a project that leaves your back aching because the surface is just a few inches too low.
- Think about your “clutter footprint” by adding built-in storage. I’ve learned the hard way that a workbench is only as good as your ability to find your tools, so try to incorporate small cubbies or even just a simple pegboard nearby to keep your surfaces clear for actual work.
- Prioritize stability over fancy aesthetics. It might be tempting to go for a super polished look, but a workbench needs to be a rock. If it wobbles when you’re sawing or sanding, it’ll drive you crazy, so always opt for thicker legs and extra bracing to keep everything steady.
- Plan for your power needs early on. It sounds small, but having a power strip mounted directly to the side of your bench saves you from a tangled web of extension cords tripping you up mid-project. It’s one of those little “future you” favors that makes a huge difference.
- Leave some room for error and expansion. I always suggest leaving a little extra space on the sides for clamps or even a small shelf for your current project. Your DIY journey is going to grow, and you’ll want a workspace that can evolve right along with your new skills!
Quick Wins for Your New Workspace
Focus on stability first; choosing heavy-duty materials now means you won’t be dealing with a wobbly, frustrating surface later on.
Don’t feel pressured to build a masterpiece right away—start with a simple, functional plan that grows with your skills and your projects.
Remember that a great workbench is about more than just tools; it’s about creating a dedicated, organized space that supports both your craft and your peace of mind.
Finding Your Foundation
“Building a workbench isn’t just about assembling wood and screws; it’s about creating a dedicated space where your ideas can finally take shape and your creativity can truly breathe.”
Emma Thompson
Bringing Your Workspace to Life
Building your own workbench is such a rewarding way to take control of your creative space. We’ve walked through everything from selecting the right heavy-duty materials to finding a plan that actually fits your skill level and room dimensions. Remember, the most important part of this process isn’t having a perfectly level surface or the most expensive hardwoods; it’s about creating a stable and reliable foundation that supports your projects and your passion. By focusing on sturdy construction and choosing materials that can stand the test of time, you are setting yourself up for countless hours of productive, stress-free making.
As you move from the construction phase to actually using your new station, I want you to take a moment to appreciate what you’ve achieved. There is something so incredibly grounding about working on something you built with your own two hands. Whether you’re using it for woodworking, organizing your tools, or even starting a small indoor garden project, this workbench is a symbol of your self-sufficiency and growth. Don’t worry about making it look “Pinterest-perfect” right away—the beauty of a handmade workspace is that it grows and evolves alongside you. Now, grab your tools, clear some space, and let’s get to work!
Frequently Asked Questions
Do I really need power tools to build this, or can I get it done with just a basic hand saw and a hammer?
That is such a great question! Honestly, you absolutely can build a solid workbench using just a hand saw and a hammer. I’ve actually tackled a few small DIY projects with nothing but hand tools, and it’s a wonderful way to slow down and really connect with your work. It might take a little more elbow grease and patience, but it’s totally doable. Don’t let the lack of power tools hold you back from starting!
How much space should I actually leave around my new workbench so I don't feel cramped while working?
This is such a great question, and honestly, it’s one of those things I wish I’d considered more before I set up my own little workshop corner! To avoid that “claustrophobic” feeling, I recommend leaving at least 3 feet of clearance on all sides. This gives you enough room to step back, move around your project, and even pull up a stool without bumping into walls. A little breathing room goes a long way for your focus!
What's the best way to keep my workbench organized so my tools don't end up in a giant, messy pile?
Honestly, I used to struggle with the “giant messy pile” syndrome too! The secret is to stop treating your workbench like a storage bin and start treating it like a workspace. I love using pegboards for my most-used tools—it keeps them visible and off the surface. For smaller bits, a few magnetic strips or even some upcycled mason jars work wonders. If everything has a “home,” you’ll actually enjoy cleaning up!
